Thunderbird Email Account Setup
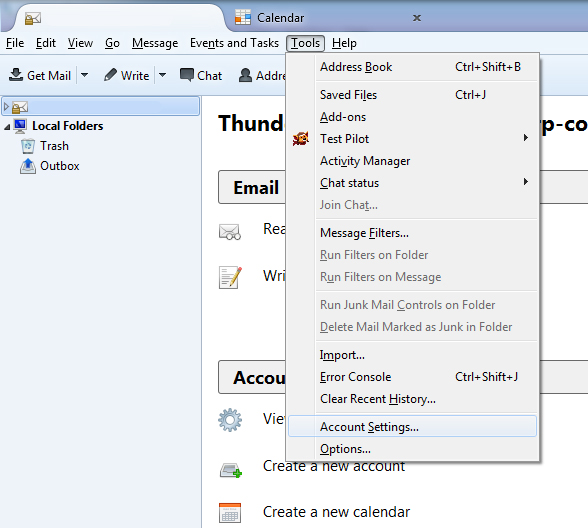
1. Add your Corporate Communications email account by selecting Account Settings under the Tools menu.
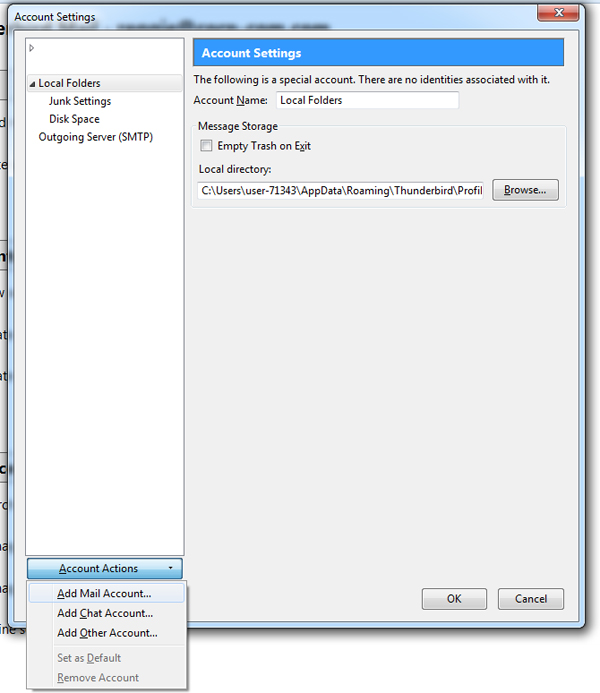
2. In the new "Account Settings" box that appears, click on "Account Actions" then "Add Mail Account."
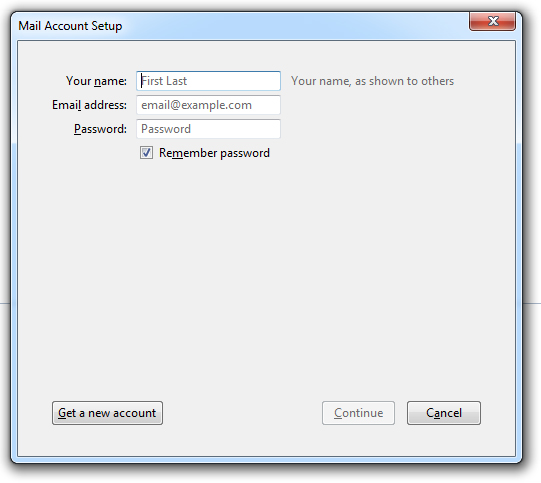
3. The "Mail Account Setup" box appears. Enter your name (ex. "John Smith"), email address (ex. "myname@somecompany.com") and password here. Be sure to check "Remember password" and then click Next.
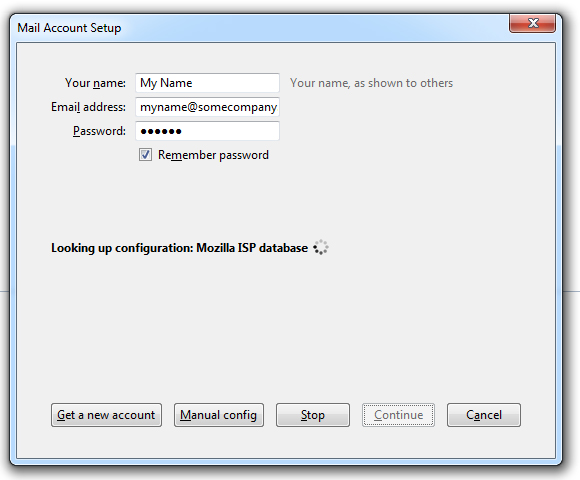
4. Thunderbird will then begin to search for email settings. Click Manual config.
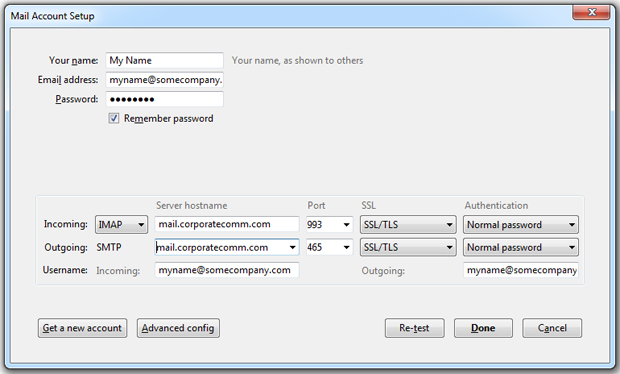
Thunderbird Final Settings

5. Once Thunderbird finishes its search, enter in your "Username" (your email address, for example, "myname@somecompany.com"), the "Incoming" server which is the mail server name located in your account sheet (ie, mail.corporatecomm.com) and the "Outgoing" server which is also "mail.corporatecomm.com". Choose POP3 or IMAP for the "Incoming" setting. The SSL dropdown settings should be set to SSL/TLS and Authentication to Normal Password for both "Incoming" and "Outgoing". Click Re-test Configuration.
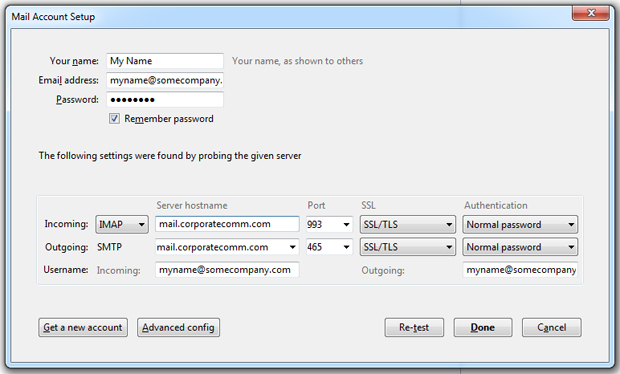
6. Thunderbird will once again perform a setting configuration. Once finished, click Done.
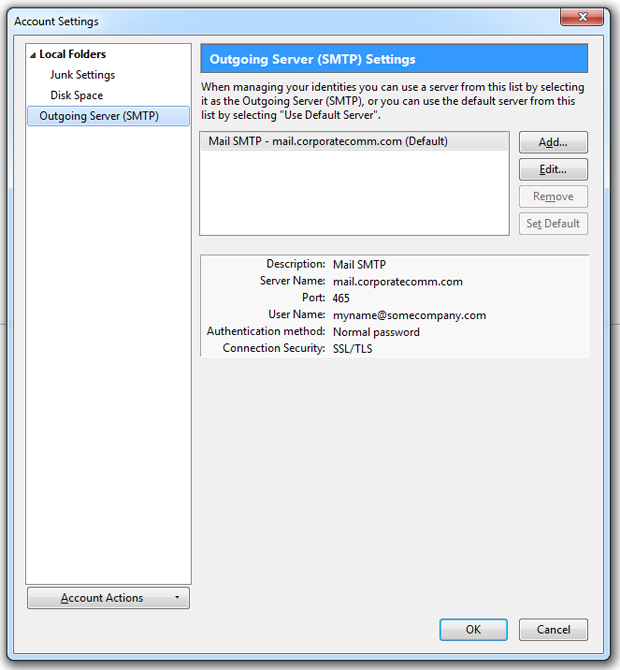
7. You'll be back at the "Account Settings" box. Click Outgoing Server and click "Add" in the Outgoing Server (SMTP) Settings.
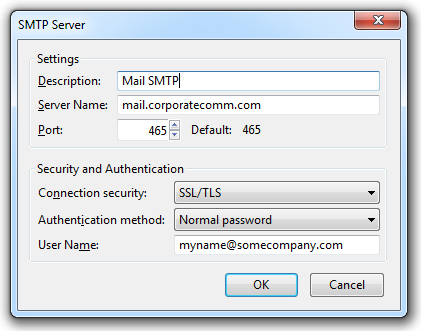
8. The "SMTP Server" box appears. For "Description" you can enter Outgoing. In the "Server Name" field, enter "mail.corporatecomm.com". The "Connection security" field should be set to SSL/TLS. The "Authentication method" should be set to Normal password. Finally, the "User Name" field is your email address (for example, "myname@somecompany.com"). Click OK.
You should be all set!
Editing Thunderbird Settings for an Existing Account
If you want to edit an existing email account's settings, here are some guidelines.

1. Access your email account settings by selecting Account Settings under the Tools menu.
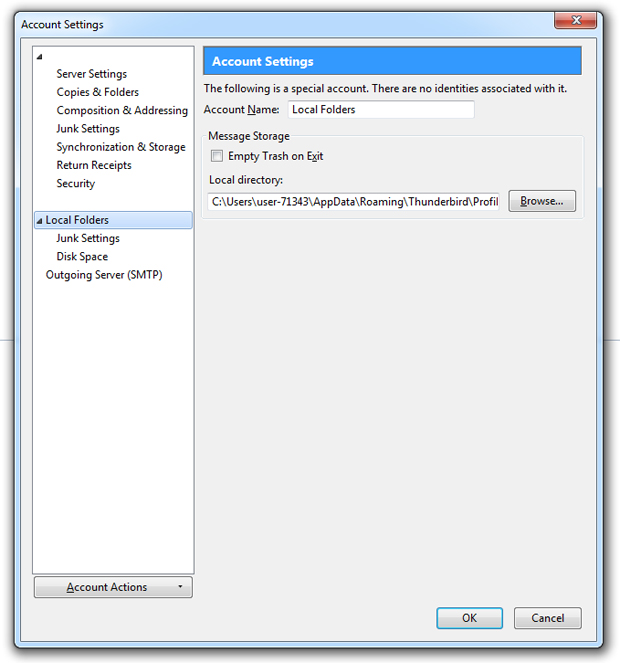
2. There will be a list of settings under your "Account Name" account.
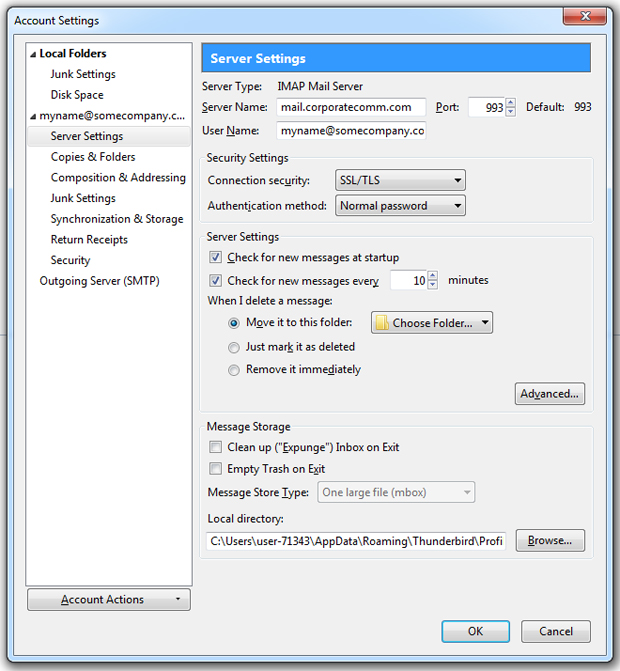
3. Click on the "Server Settings" tab to edit the incoming server name.

4. To change the SMTP server, click on the "Outgoing Server (SMTP)", choose the SMTP server you want to change then click on Edit.

5. The "Description" will be the name you gave your account and under "Security and Authentication", choose SSL/TLS for "Connection security" and Normal password for "Authentication method".
In the "User Name" dialog box use the same username as the incoming server (i.e. your email address, myname@somecompany.com)
You should be all set! The next time you try to connect a dialog box will appear asking for a password. Enter your password and select the option to remember so that you will not be asked to enter a password again.
Need a hand with Google Workspace Migration or Integration?
Let us know and one of our Google Consultants will get in touch to discuss details of our one-time or ongoing Google Workspace Support Solutions. As a Certified Google Partner, you can rely on our highly skilled team to answer your questions and provide the needed guidance to seize the full power of Google Workspace.


